Description
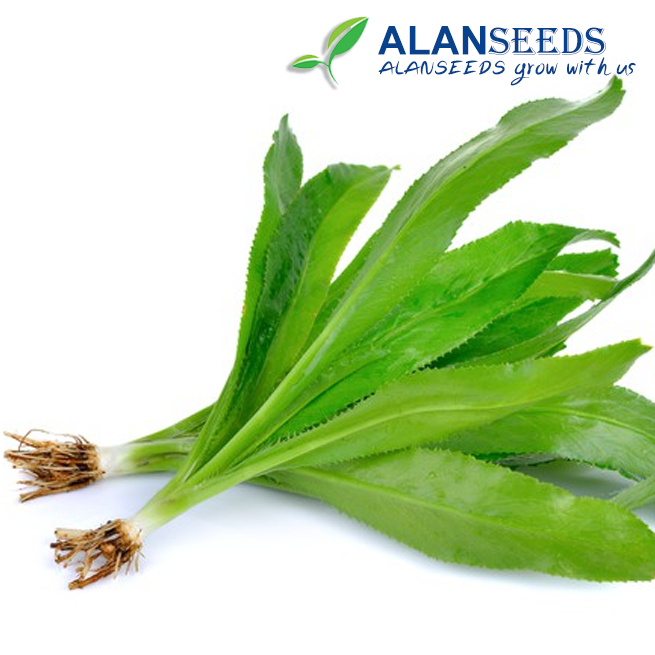
Culantro Organic Seeds – Heirloom, Open Pollinated, Non GMO – Grow Indoors, Outdoors, In Pots
100% Organic Seeds We offer the highest quality 100% organic seeds online at the best price. All our seeds are non GMO and are harvested using sustainable practices. Most folks don’t need hundreds of single crop seeds for their backyard gardens. We offer smaller batches so you can grow different fruits, vegetables, herbs and spices.
The Beginner's Guide to Growing Culantro from Organic Seeds
Hey there, future garden guru! Ready to get your hands dirty and grow some culantro? Awesome choice! Culantro is like the secret ingredient that makes Asian dishes sing. And guess what? You can grow it right at home, whether you've got a big garden or just a sunny spot on your windowsill. Here's how:
What You'll Need:
- Culantro seeds (Look for organic, heirloom, open-pollinated, non-GMO ones. They're the best!)
- Potting soil
- Pots or containers (if you're going for the indoor or pot option)
- Outdoor garden space (if you're going full-on outdoor)
- Watering can or hose
- Sunshine or grow lights (if indoor is your vibe)
Step 1: Starting Seeds (Indoors)
First things first, fill your pots with that good ol' potting soil. Make sure it's nice and moist but not swimming-pool wet.
Now, sprinkle those culantro seeds on top of the soil. Don't worry about burying them; just pat them down gently.
Step 2: Light and Water
Culantro loves soaking up that sunshine, so find a sunny spot for your pots by a window. If the sun's feeling a bit shy, you can bring in some grow lights to save the day.
Keep those babies hydrated! Water your culantro regularly, but don't drown them. Just aim for moist soil, not a soggy mess.
Step 3: Planting Outdoors
Got yourself some outdoor space? Lucky you! Find a sunny spot in your garden and prep the soil by giving it a good loosen with a fork or shovel.
Sprinkle your culantro seeds right onto the soil and give them a light dusting of soil on top. No need to bury them too deep – they like a little sunshine on their heads.
Step 4: TLC (Tender Loving Care)
Whether indoors or outdoors, check in on your culantro buds regularly. Keep the soil moist, pull out any pesky weeds, and maybe give them a little support if they start to lean too much.
If you're feeling fancy, you can mulch around your plants to keep moisture in and weeds out. Plus, it'll give your garden that extra oomph!
Step 5: Harvest Time
Around 8-10 weeks in, your culantro should be looking pretty lush. Time to get snipping! Just pluck off the outer leaves as you need them, leaving the center to keep on growing.
The more you harvest, the more your culantro will grow back. It's like magic, but tastier!
Step 6: Let's Eat!
Boom! You did it! Now it's time to reap the rewards. Add those fresh culantro leaves to your favorite Asian dishes – soups, salads, stir-fries – you name it!
Remember, gardening's all about having fun and getting your hands dirty. So don't stress if things don't go perfectly. Just enjoy the journey and the delicious culantro along the way! Happy growing, friend! 🌱🌞